Exhibit 2 - Masking
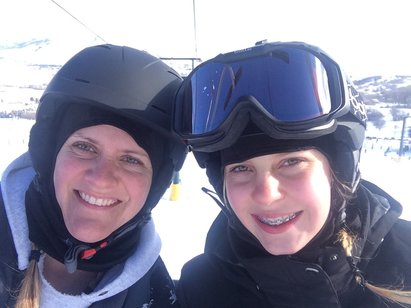
Before
|
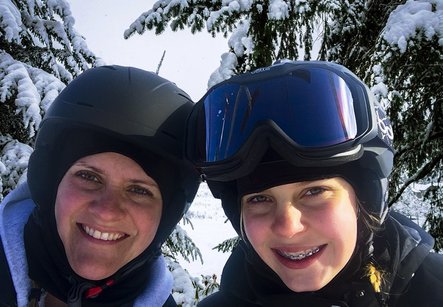
After
|
Design Thoughts:
I wanted to change the background of this picture and fix some of the highlight and color issues.
Image from: https://pixabay.com/en/winter-valley-forest-snowy-273406/
I wanted to change the background of this picture and fix some of the highlight and color issues.
- Contrast: The dark and light colors now have a greater contrast.
- Alignment: The bottom of the image was cropped to move the faces lower to be able to see the tree background more.
- Color: The colors stand out more and don't look as washed out.
- Using Camera Raw, some adjustment were made to decrease the highlights and enhance the colors.
- The photo was added as a layer on the tree background.
- The Quick Selection tool was used to select the faces and create a new layer mask, and make some monor color adjustments using the Select & Mask tool.
- A Vibrance adjustment layer was added to the background.
- A Curves adjustment layer was added to the photo to decrease the blues.
- A luminosity masking action was added to the image, and used to add a Curves adjustment to the shadows, and a Curves adjustment to the brightest whites.
- The Spot Healing brush tool was used to get rid of a few blemishes and wrinkles.
Image from: https://pixabay.com/en/winter-valley-forest-snowy-273406/
